***Friday Favorites will be back next week!***
Yes, I’m that mom who makes baby food. To be honest, I debated about whether or not I should even post this. Silly, right? Perhaps I’ve read too many articles and blogs that make this parenting thing seem like a breeze (all while maintaining a magazine-worthy home, of course) and I don’t want to come across that way. So let me start off by saying that I make baby food because I really enjoy it. I love being in the kitchen and making things from scratch. That’s my jam. It also helps that I work part-time from home, so I have the time to do it. I do love that I know exactly what’s going into Quinn’s mouth and that she is happy and healthy.
Let’s see, what point am I trying to make? Oh yeah, so babies need food. And I’m here to tell you that making baby food is actually pretty easy (and cheap!). Give it a try!
We started Quinn on solids at six months, introducing each new food with 4-6 days in between to make sure she wasn’t allergic before we moved on to the next food. At first we started with just one small portion (maybe 1/4 cup) of pureed fruits or veggies a day, but her demand grew pretty quickly and we worked our way up to larger servings by the time she was seven months. Also, because she is still drinking breastmilk and I tend to have low iron, we do buy an iron-fortified oatmeal and serve that for breakfast every morning, as recommended by our pediatrician.
Of course, you should consult with your pediatrician to find out what is best for your baby.
With all of that said (I got a little long-winded, sorry about that), it’s time to start! To begin, you will need the proper supplies:
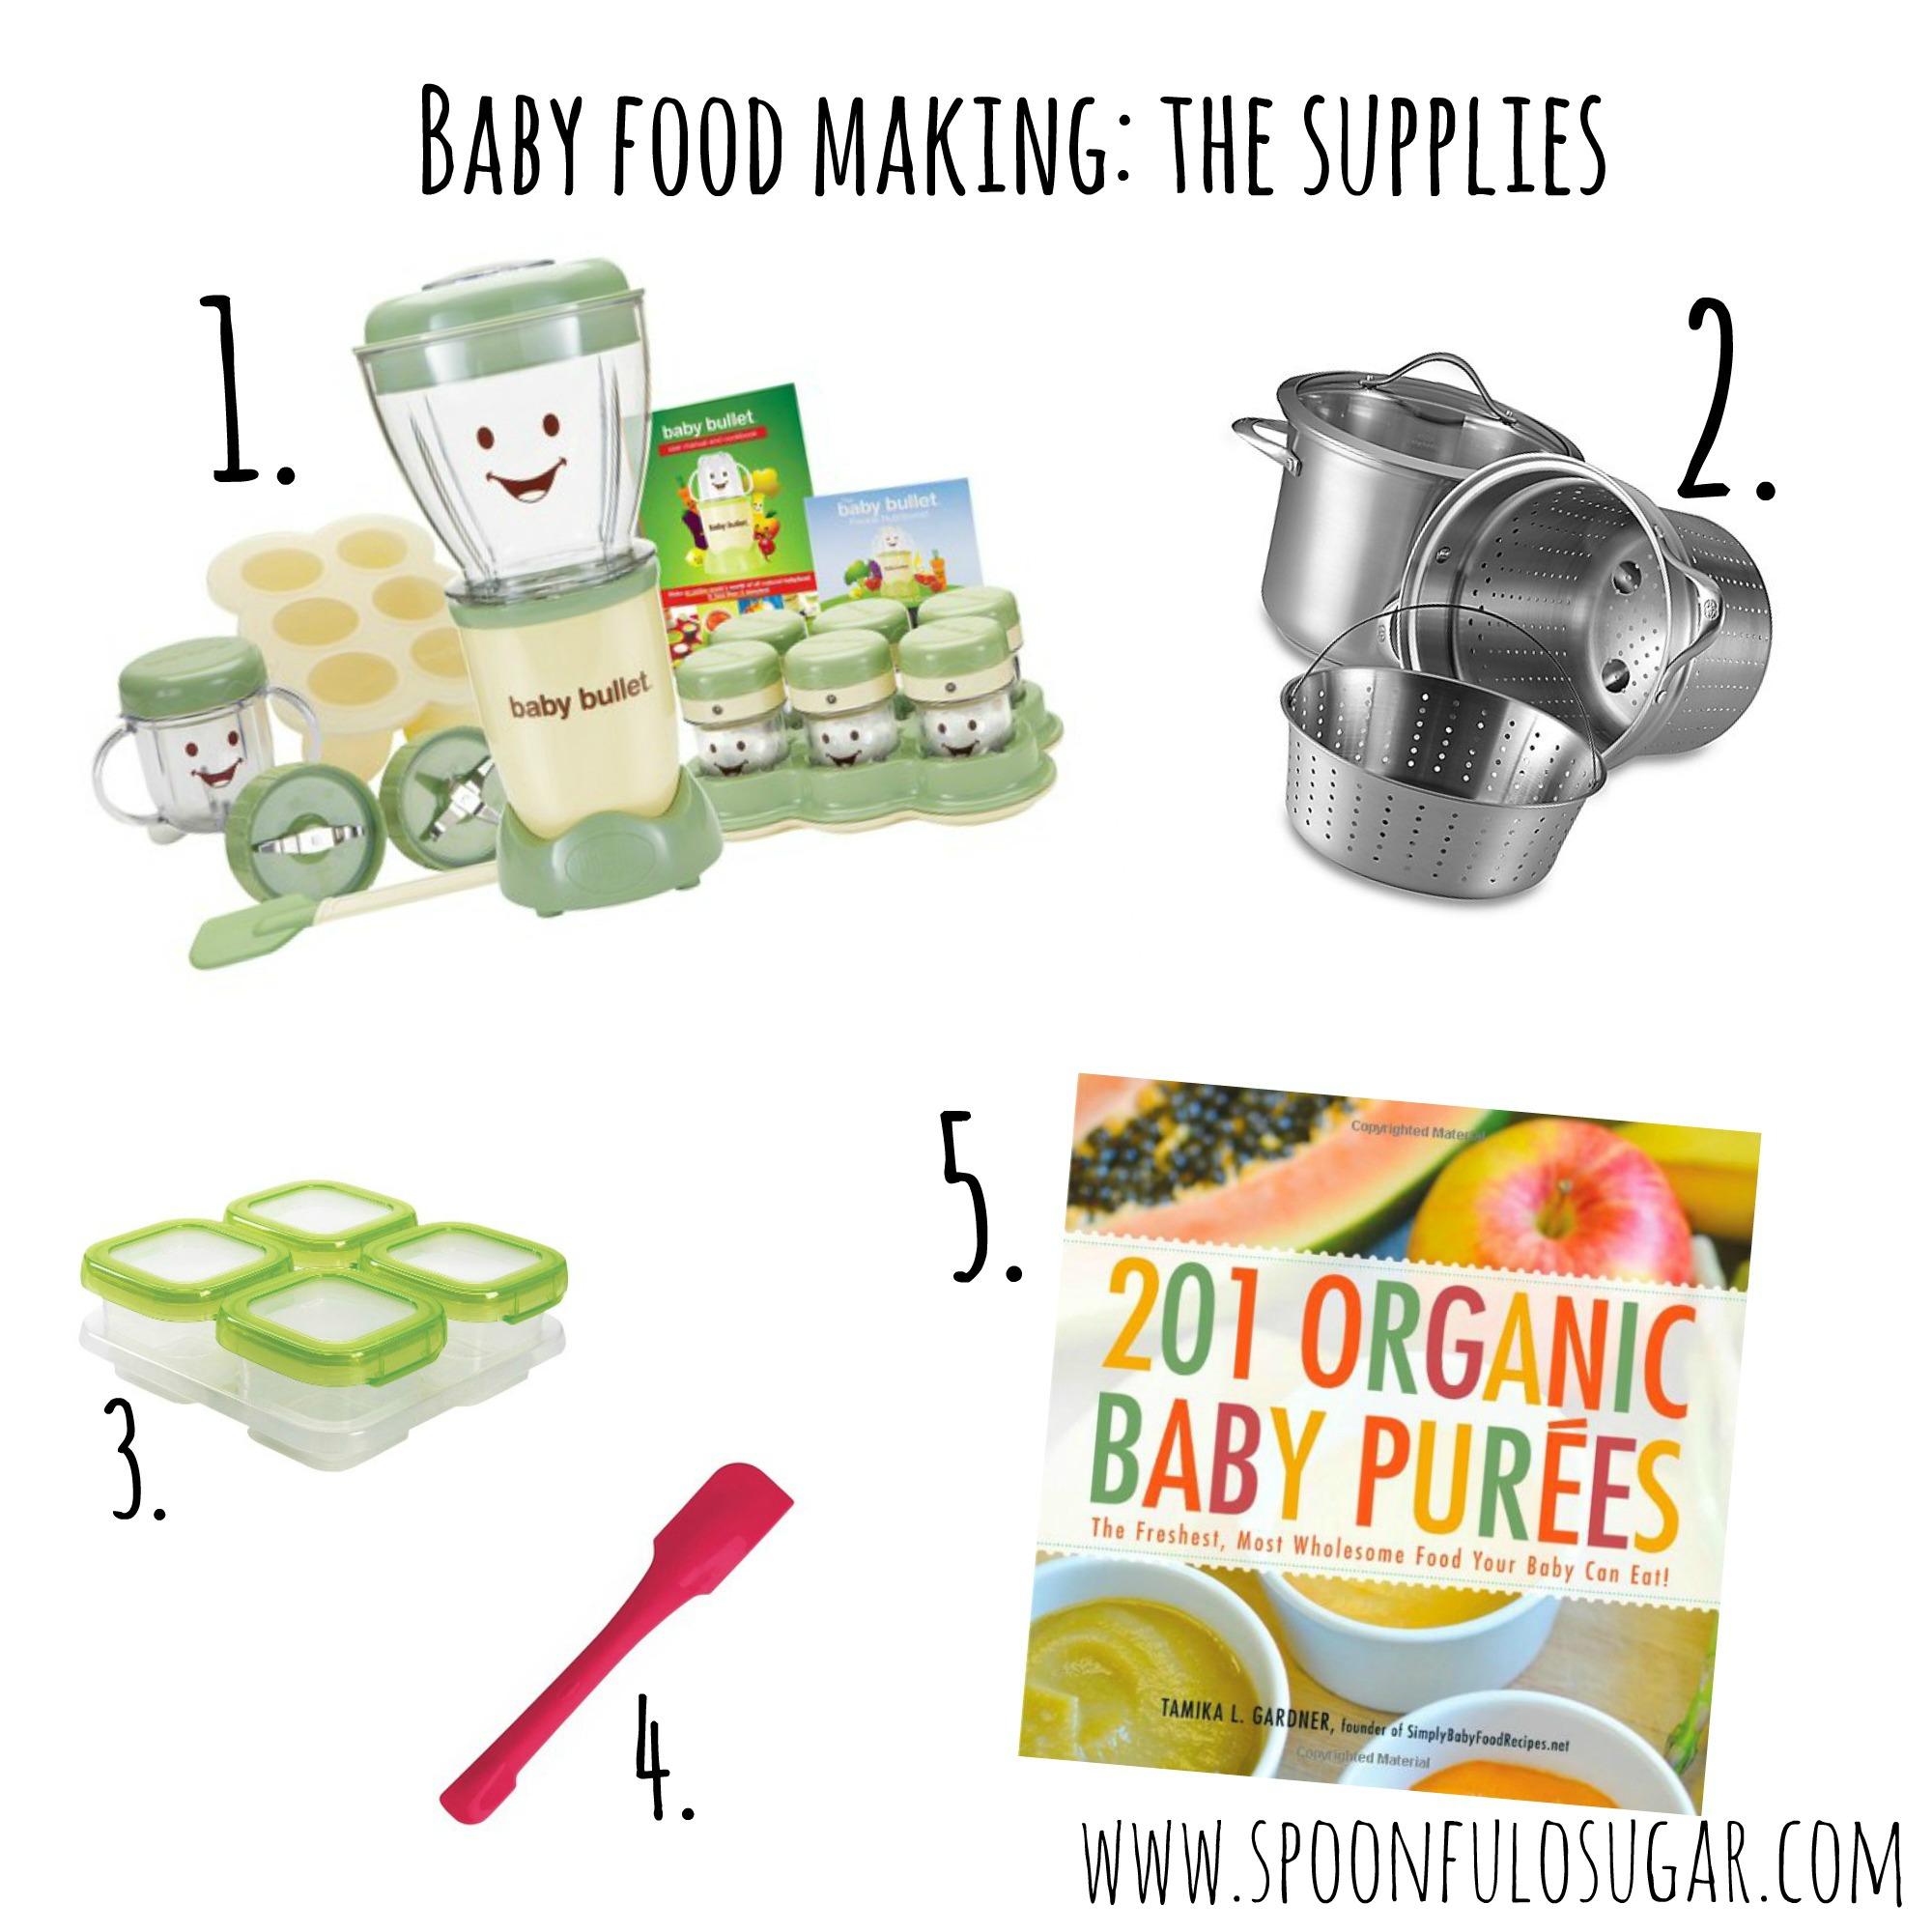 1. A good baby food making system. I use the Baby Bullet, but a blender or food processor would work.
2. A steamer for veggies. I love this Calphalon pot (it’s great for making pasta, too). This isn’t completely necessary because a lot of foods can be boiled or baked, but I find it very helpful for things like broccoli, carrots, and green beans.
3. Freezer-safe food storage. These blocks from OXO are my favorite! They are easy to stack and they hold just the right amount of food for Quinn’s hearty appetite.
4. A good spatula for scraping every last bit of the puree out of the blender. This is one of my favorites.
5. Recipes! I absolutely love this cookbook, it has been a wonderful guide!
Now that you have the proper tools, it’s time to shop for food! Buying fresh, organic food is the best way to go. However, organic food tends to be more expensive and, often times, harder to find. So, at least try to stick with buying organic produce for what experts have dubbed “The Dirty Dozen.” These foods contain higher amounts of pesticides that are best kept away from baby:
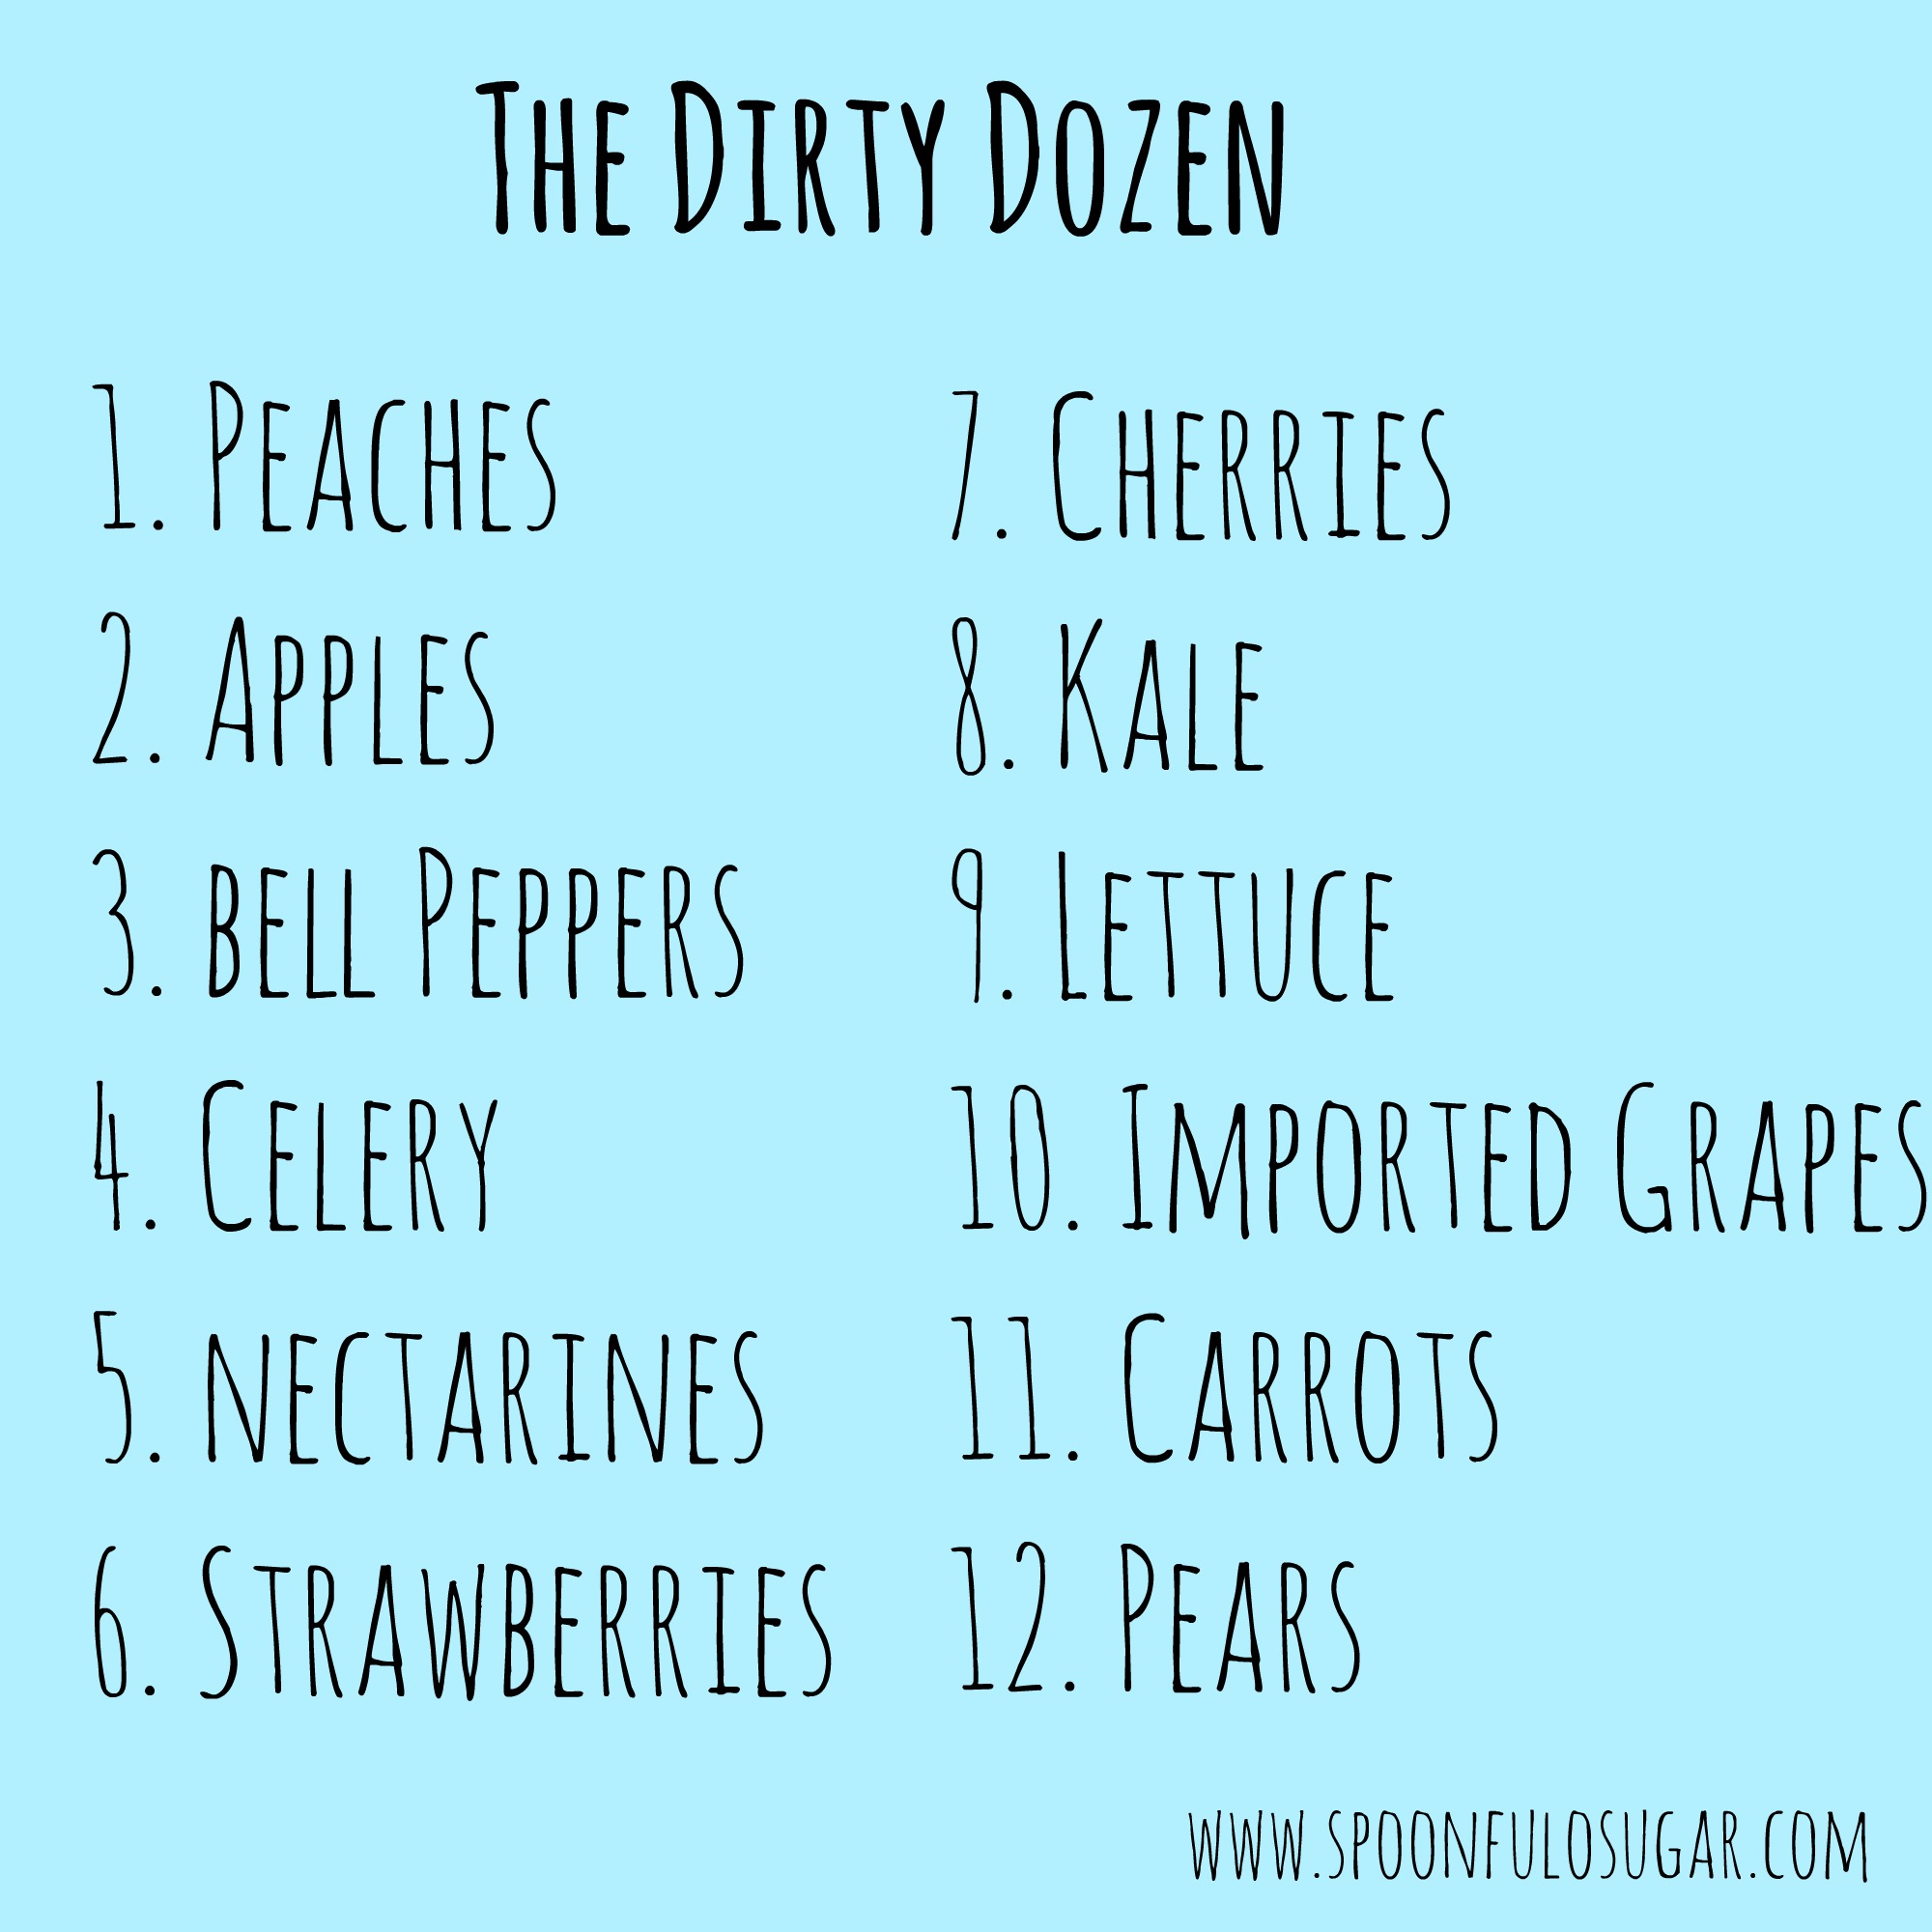 Some add blueberries, collard greens, potatoes, plums, green beans, spinach, imported cucumbers & summer squash to the list, making the list “The Toxic Twenty.” When buying produce that’s not on the above list, just aim for what is in season or looks great.
Aside from fresh produce, I also love buying frozen fruits and veggies (especially if the fresh produce is looking sad). Frozen fruits and veggies are picked at the height of freshness and then flash frozen, so they are retain their nutrients better than older produce or canned food. I do buy some canned goods (beans are great, but make sure there’s no added sodium), just because they have a long shelf-life and they would be a lifesaver in a power outage.
So now that we have our supplies and food, it’s time to get cooking!
Here are some recipes and pictures of the processes used to make them. I tried to pick a good mix of fresh, frozen, and canned foods to give you a good variety.
***make sure to wash all produce before slicing into it***
***freezer-friendly recipes are best used within 30 days***
***purees stored in the fridge should be used within 3 days***
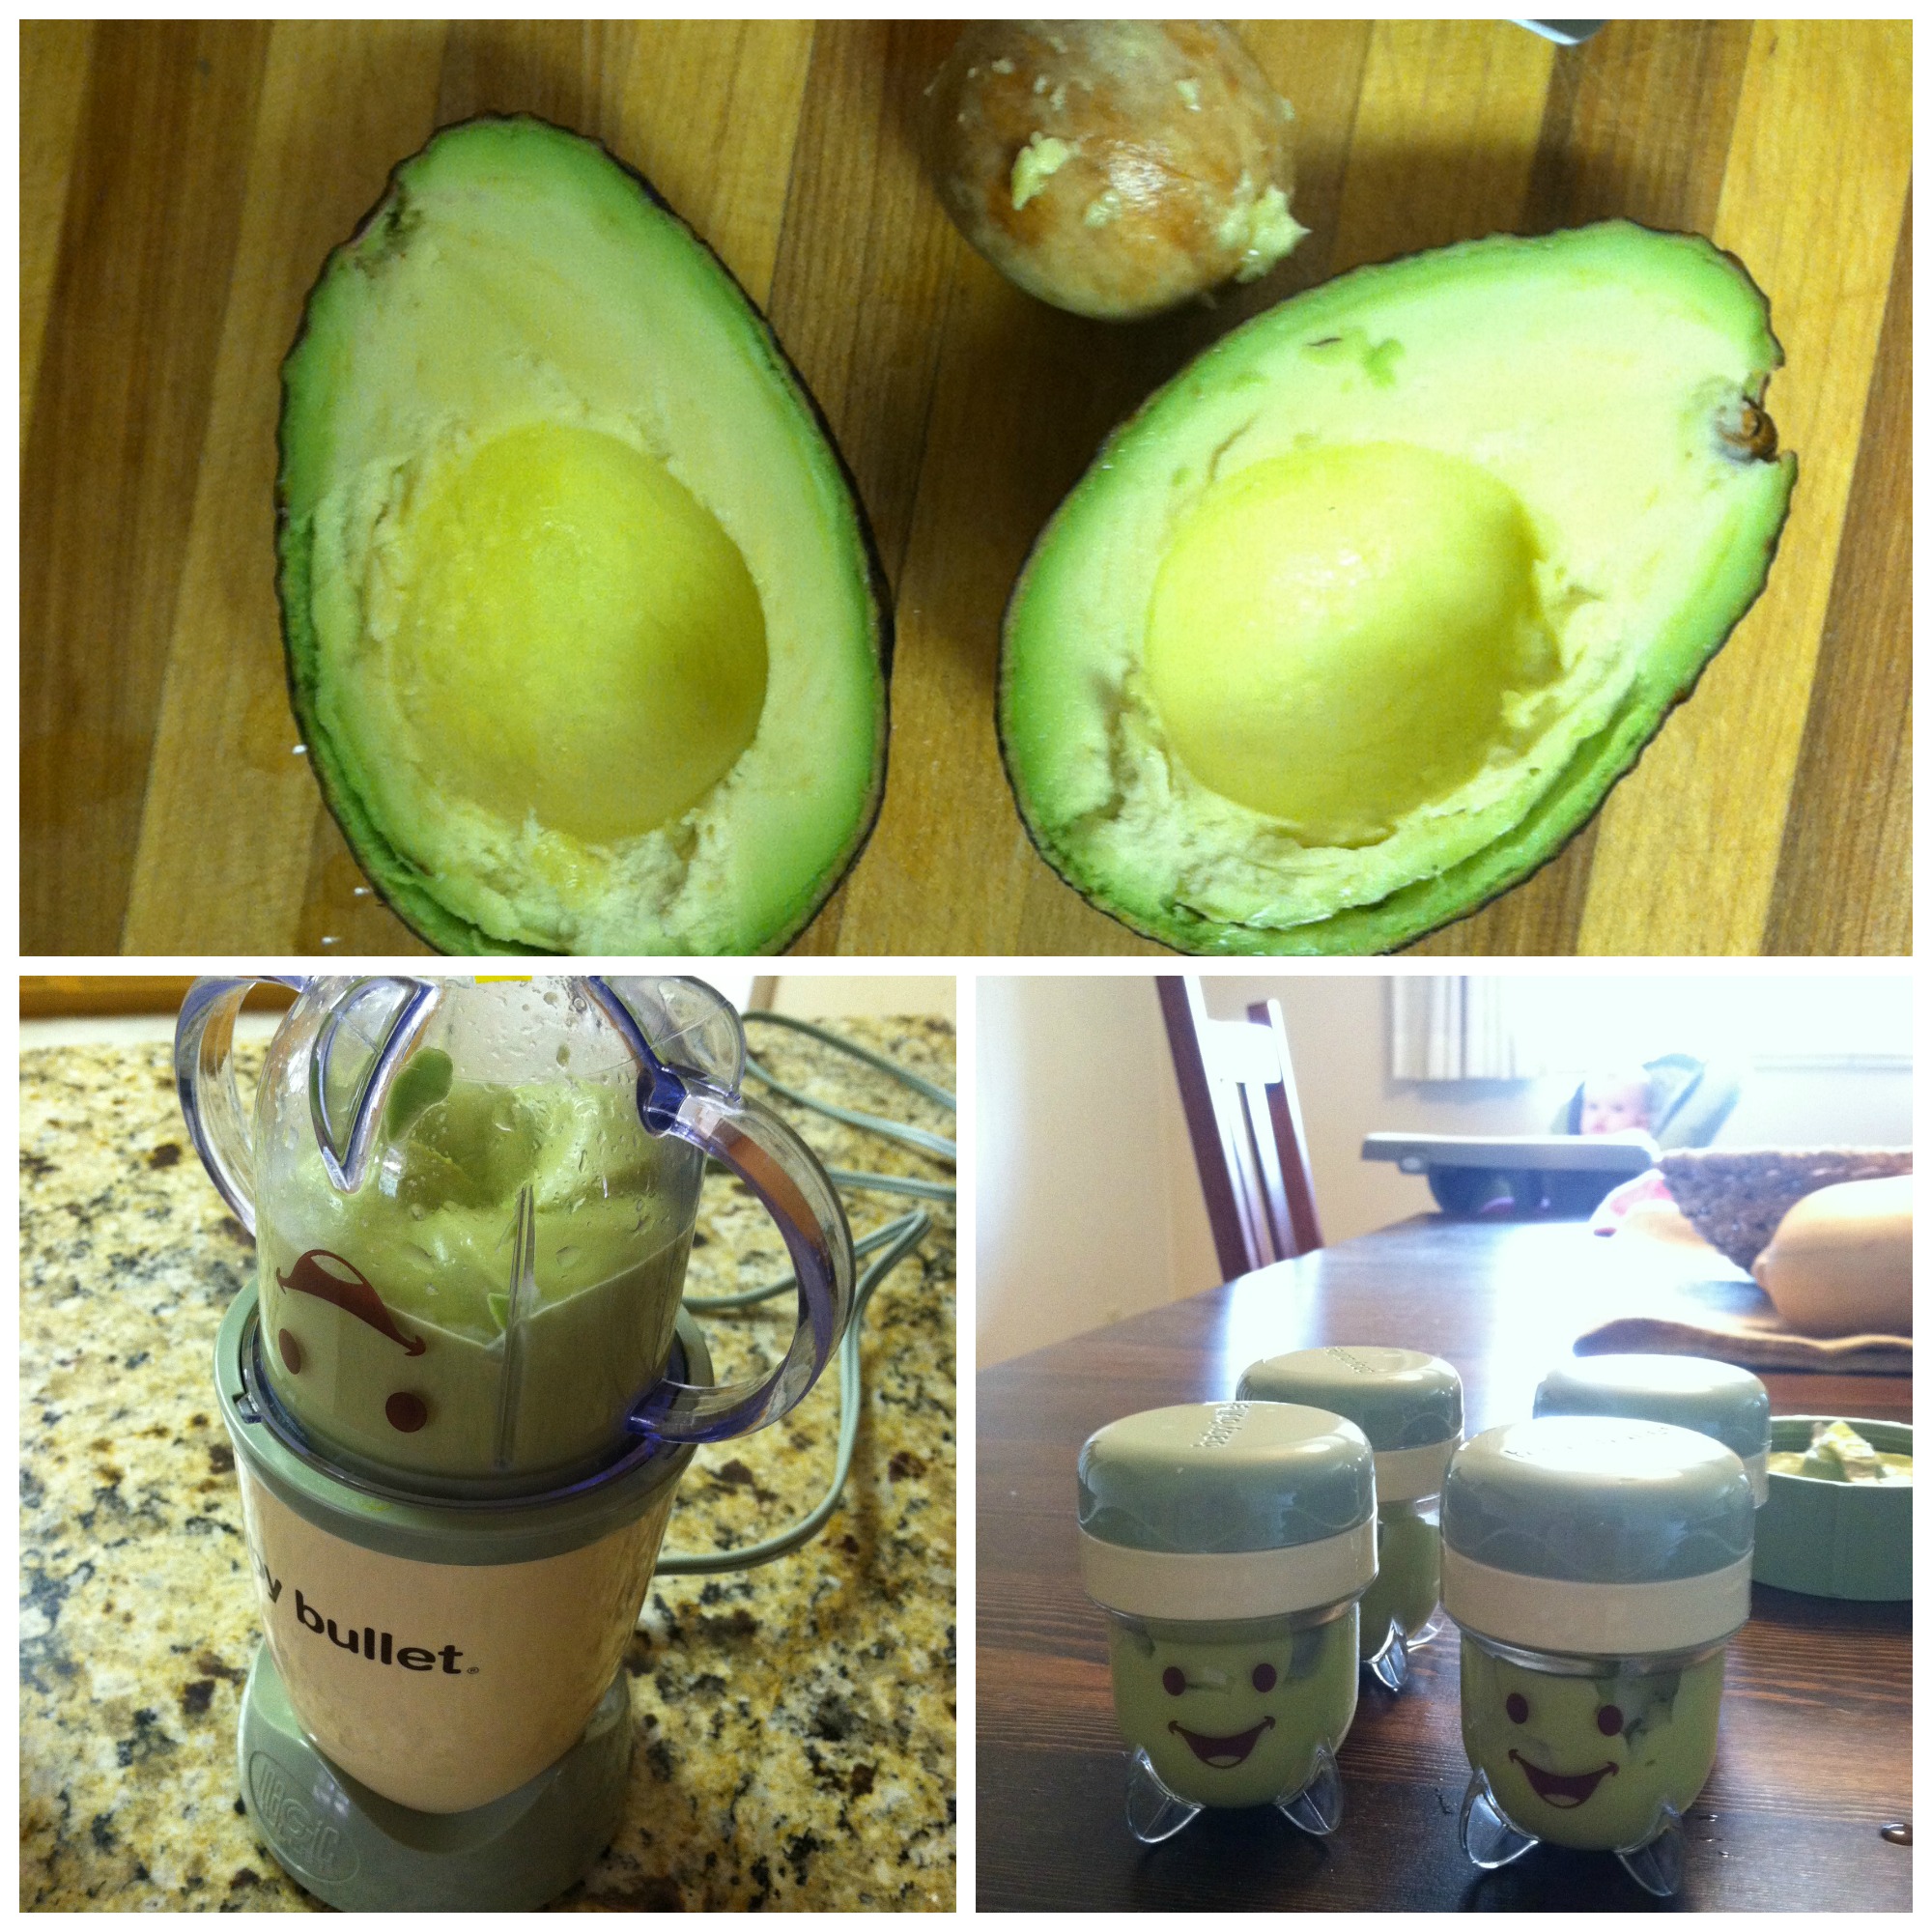
Avocado
Slice in half and remove pit. Scoop out the avocado into your blender bowl and blend until smooth. For a chunkier puree, simply mash with a fork. Best if used within 1-2 days.
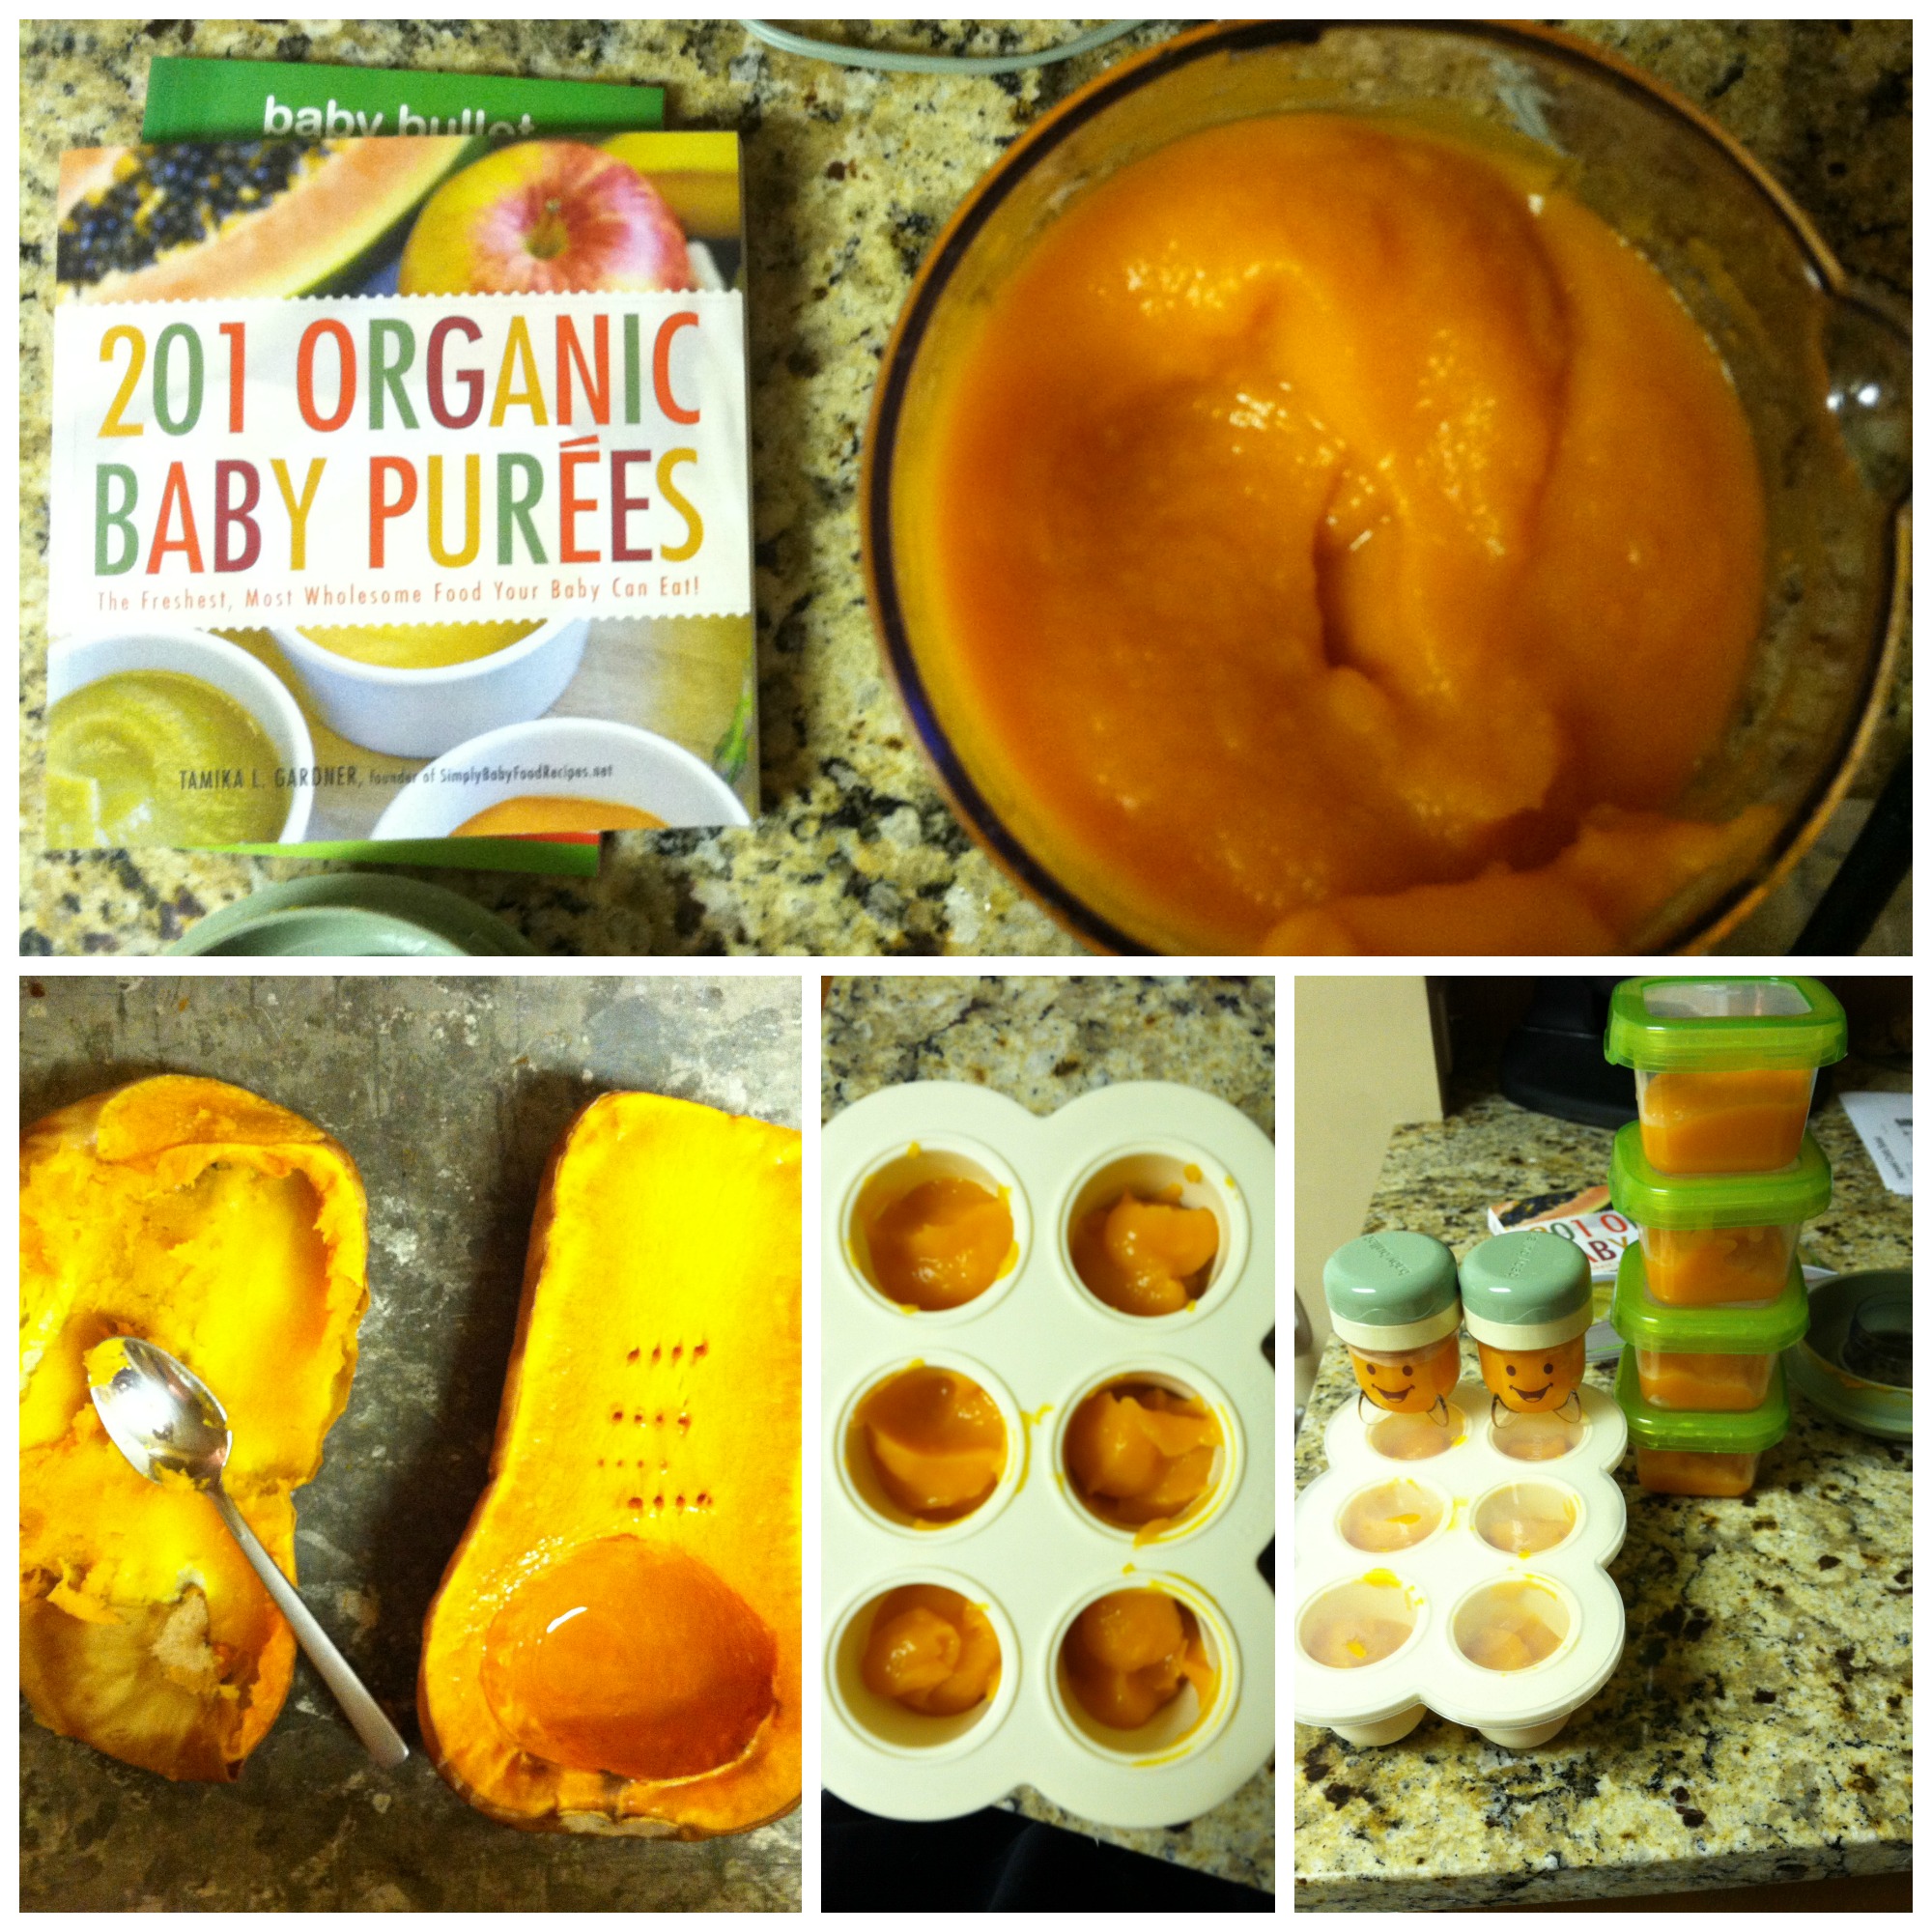
Slice squash in half and scoop out the seeds. Place skin side down on a baking sheet and bake at 350 for 30 minutes or until the squash is soft (easily pierced with a fork, which can take up to an hour for a larger squash). Allow the squash to cool for a little bit and then scoop it out into the blender and blend to desired consistency. Freezer-friendly. I get 12 servings out of half a large butternut squash.
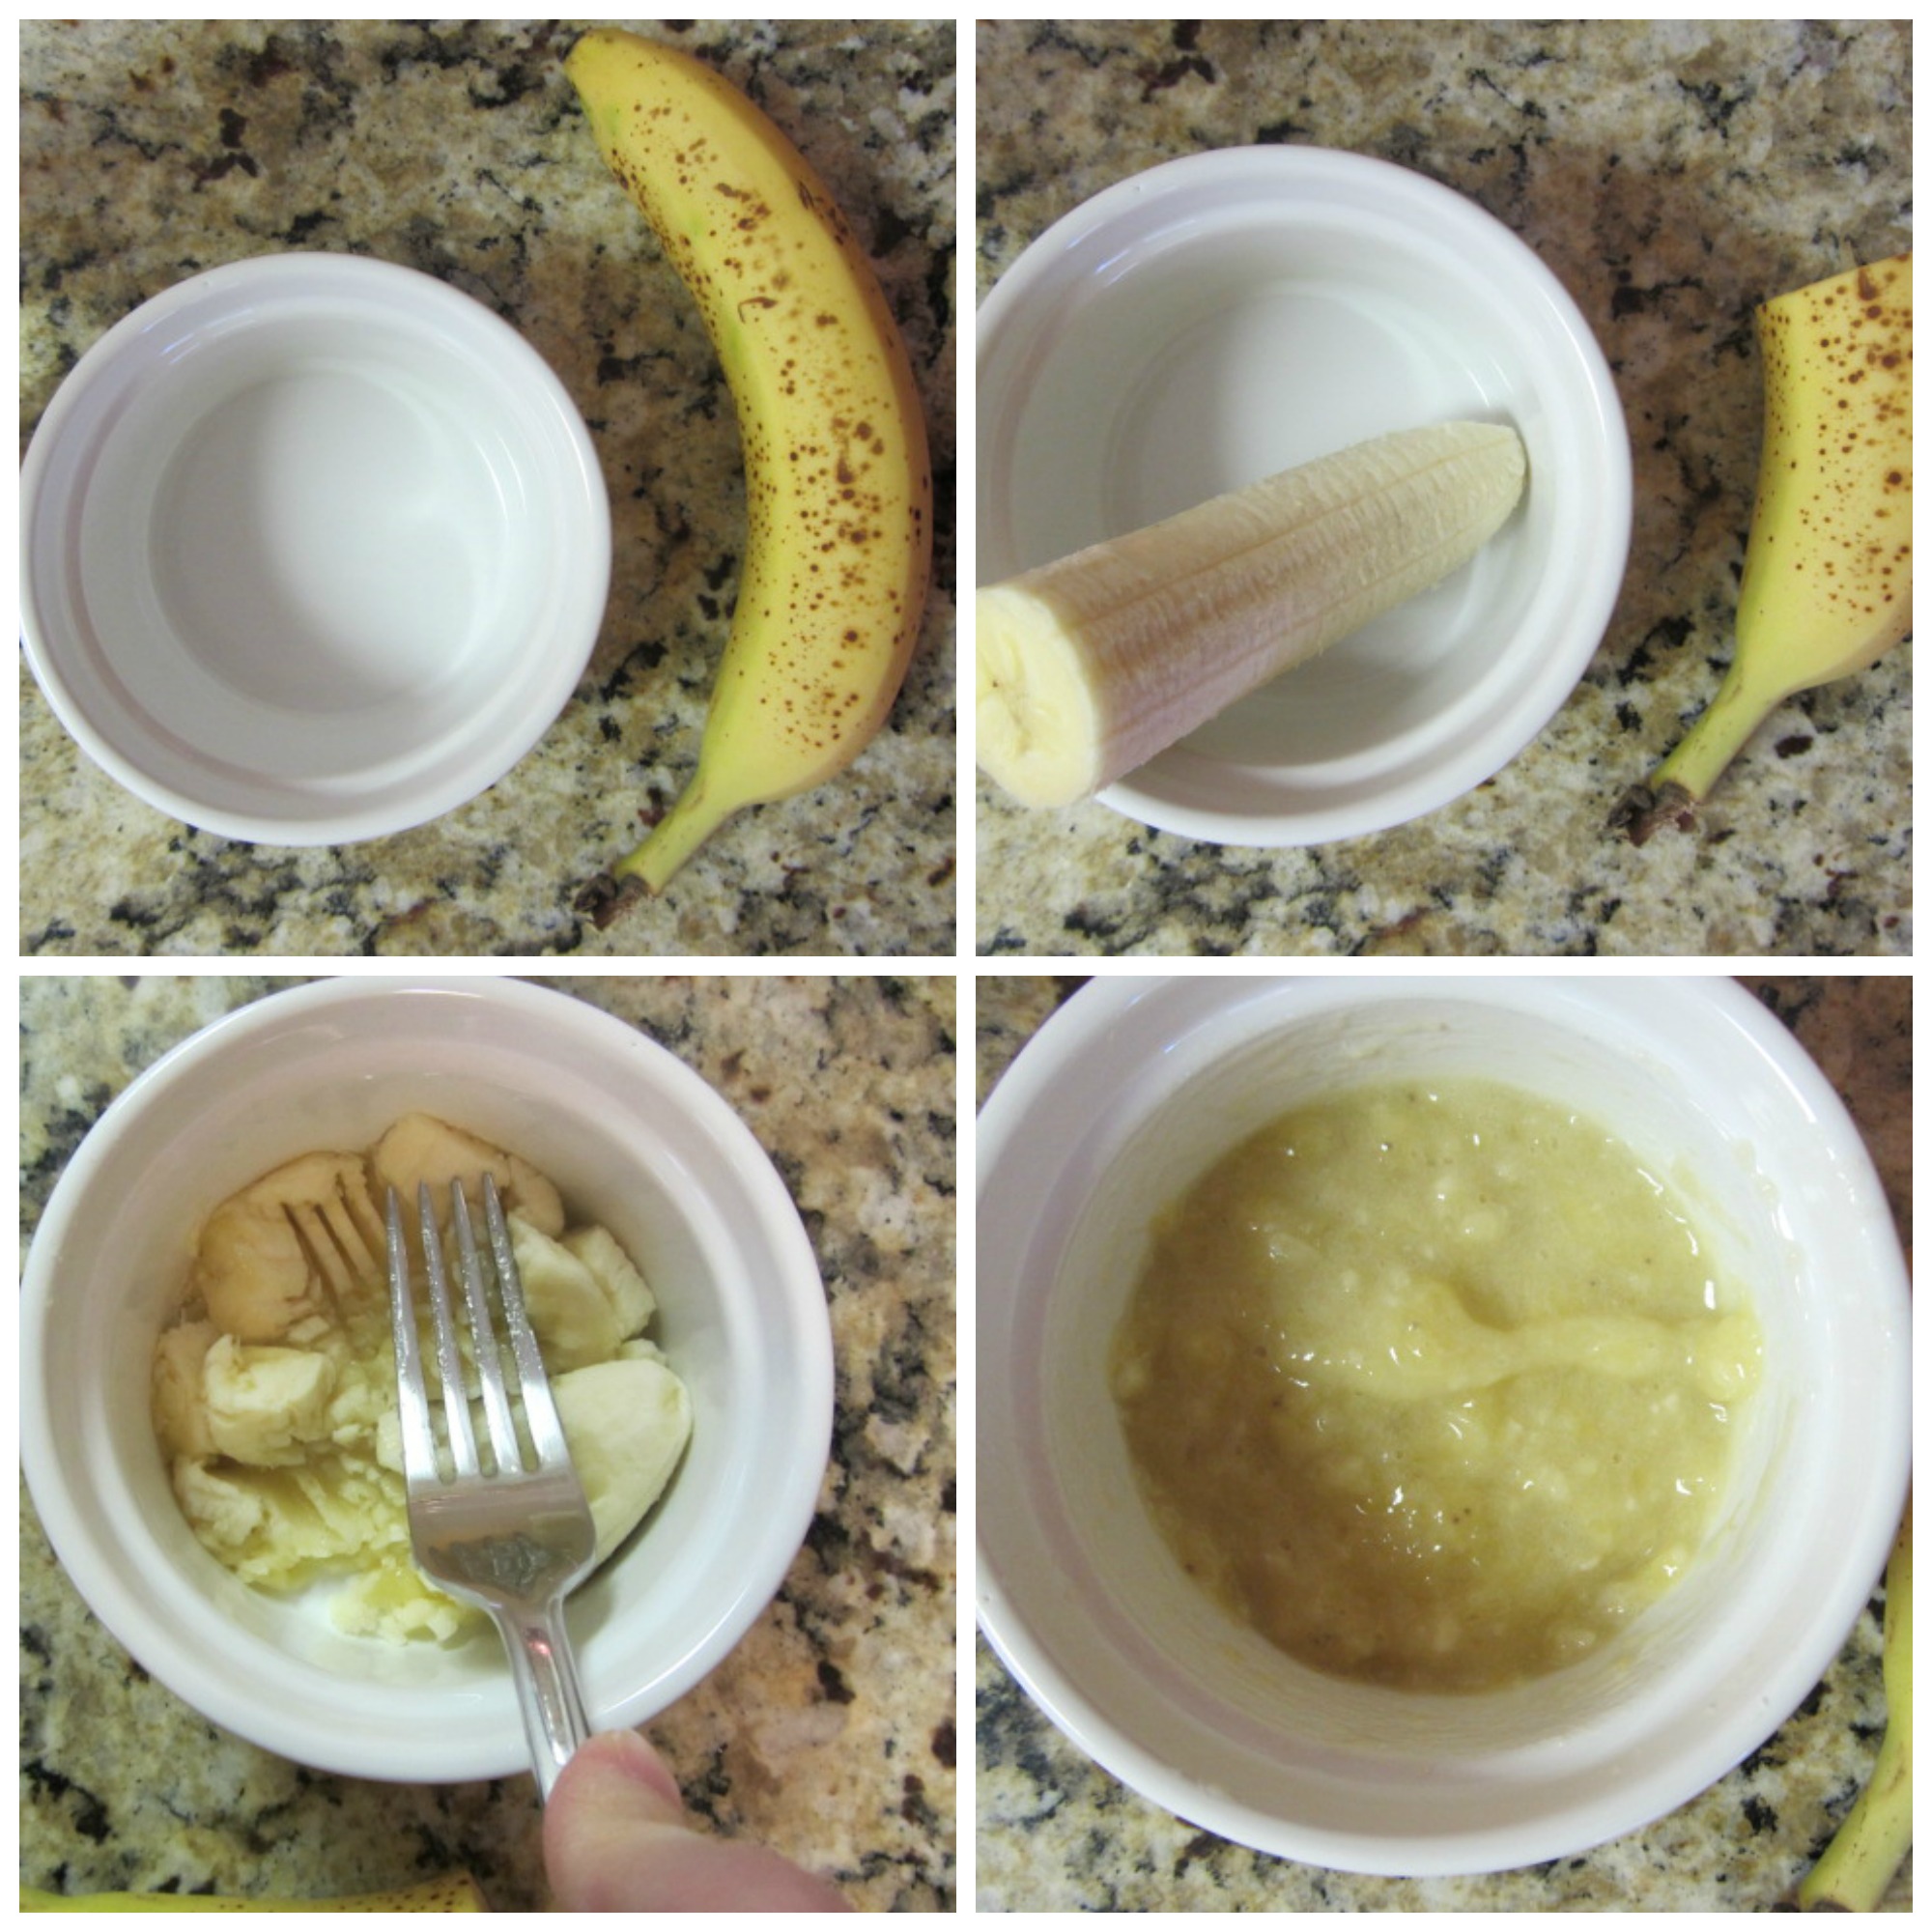
Peel banana, place in bowl, and mash with a fork. (I give the banana the award for EASIEST BABY FOOD EVER!)
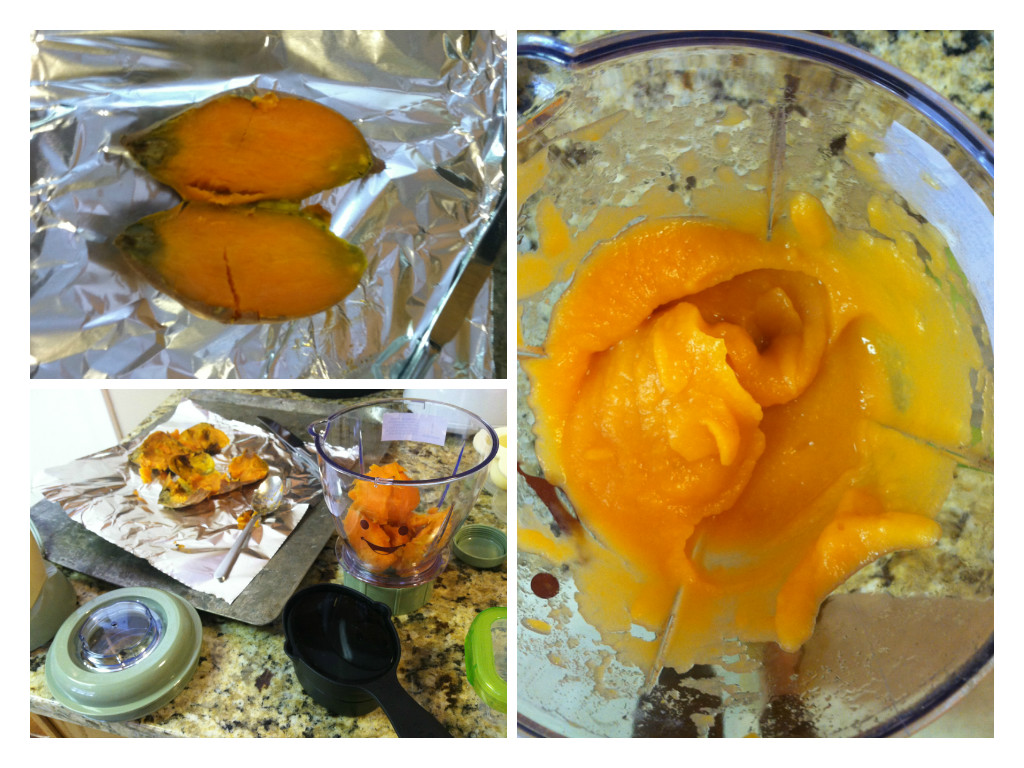
Wash 2 sweet potatoes well, slice each in half, and place on baking sheet. Bake at 350 for about 45 minutes, until potatoes are soft (easily pierced with a fork). Allow to cool a bit and then scoop out the inside of potatoes, place in blender, and blend until smooth. Freezer-friendly. I usually get around 8 servings from two potatoes, it just depends on how big the potatoes are. **use same recipe for white potatoes, may need a little liquid to thin out
I took the easy route and bought a can of pumpkin puree. Just make sure it’s 100% pumpkin. This is a great choice for busy days!
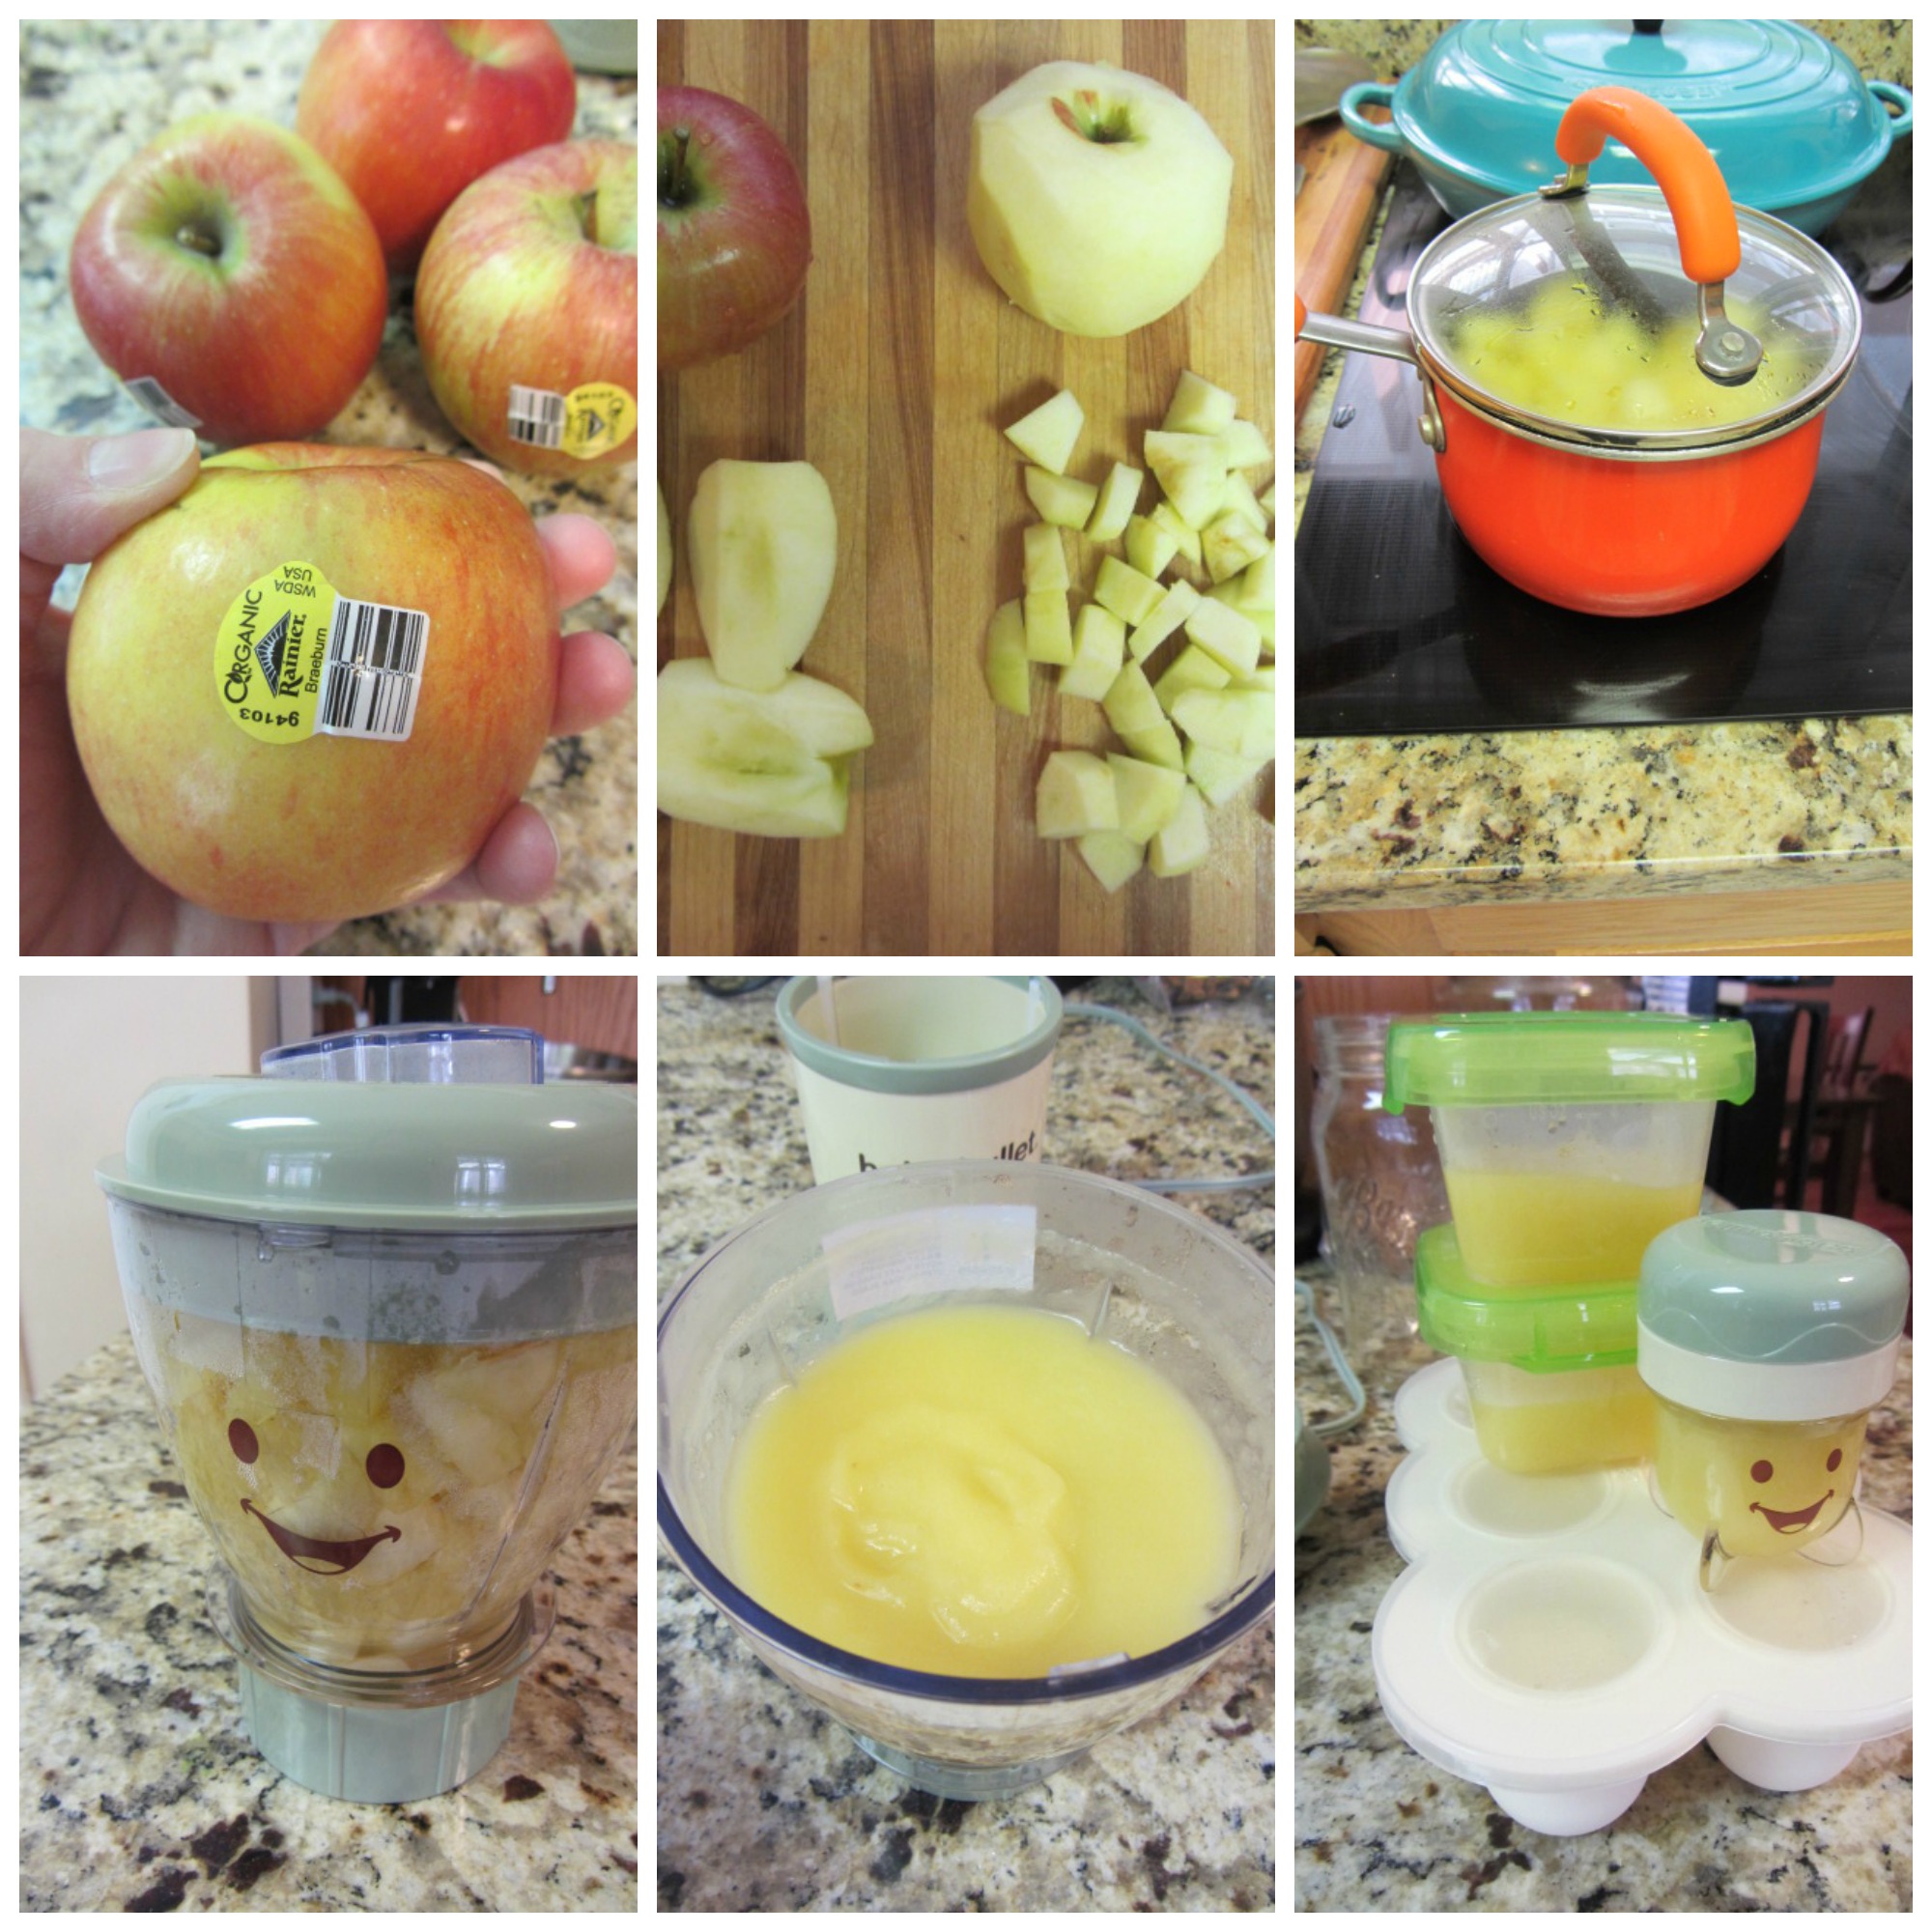
Wash, peel, core, and chop 4 apples (Braeburns are my go-to). Place in saucepan and add 2 tablespoons of water. Simmer for about 10 minutes until the apples are tender. Blend until smooth. Makes about 8 servings.
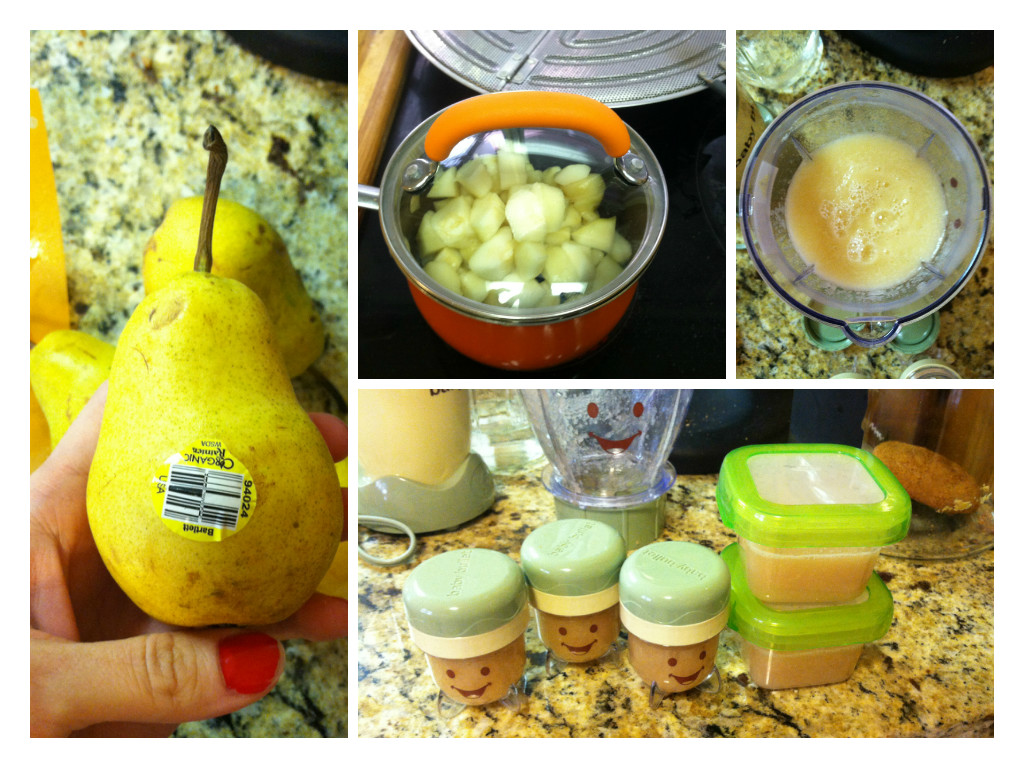
Wash, peel, core, and chop 4 pears. Place in saucepan, cover with lid, and simmer for about 7 minutes. Blend until smooth. Makes about 6 servings. Freezer-friendly.
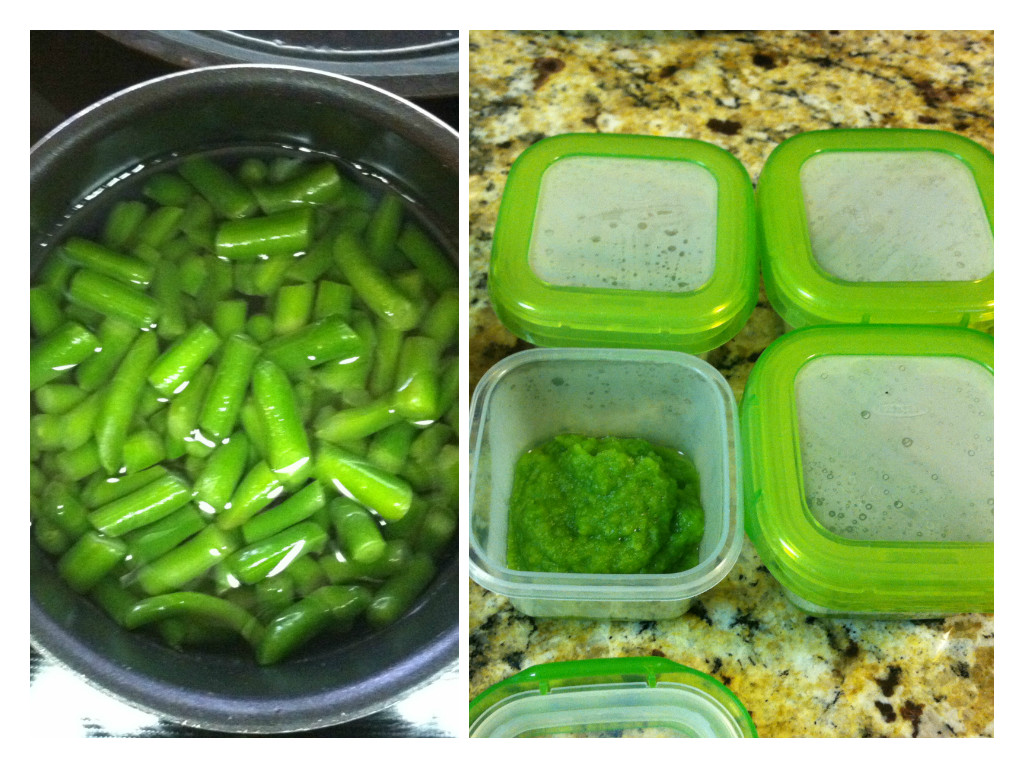
Add 1 cup of fresh or frozen green beans to a saucepan. Cover green beans with an inch of water and cover saucepan with a lid. Bring to a boil and then reduce to a simmer. Cook for 5-7 minutes. Alternatively, you could steam them (I switch between the two methods) using the same amount of cook time. Puree until smooth. Add additional liquid, if desired. Makes around 4 servings. Freezer-friendly. ***the same recipe applies to peas, just cook for 10-12 minutes
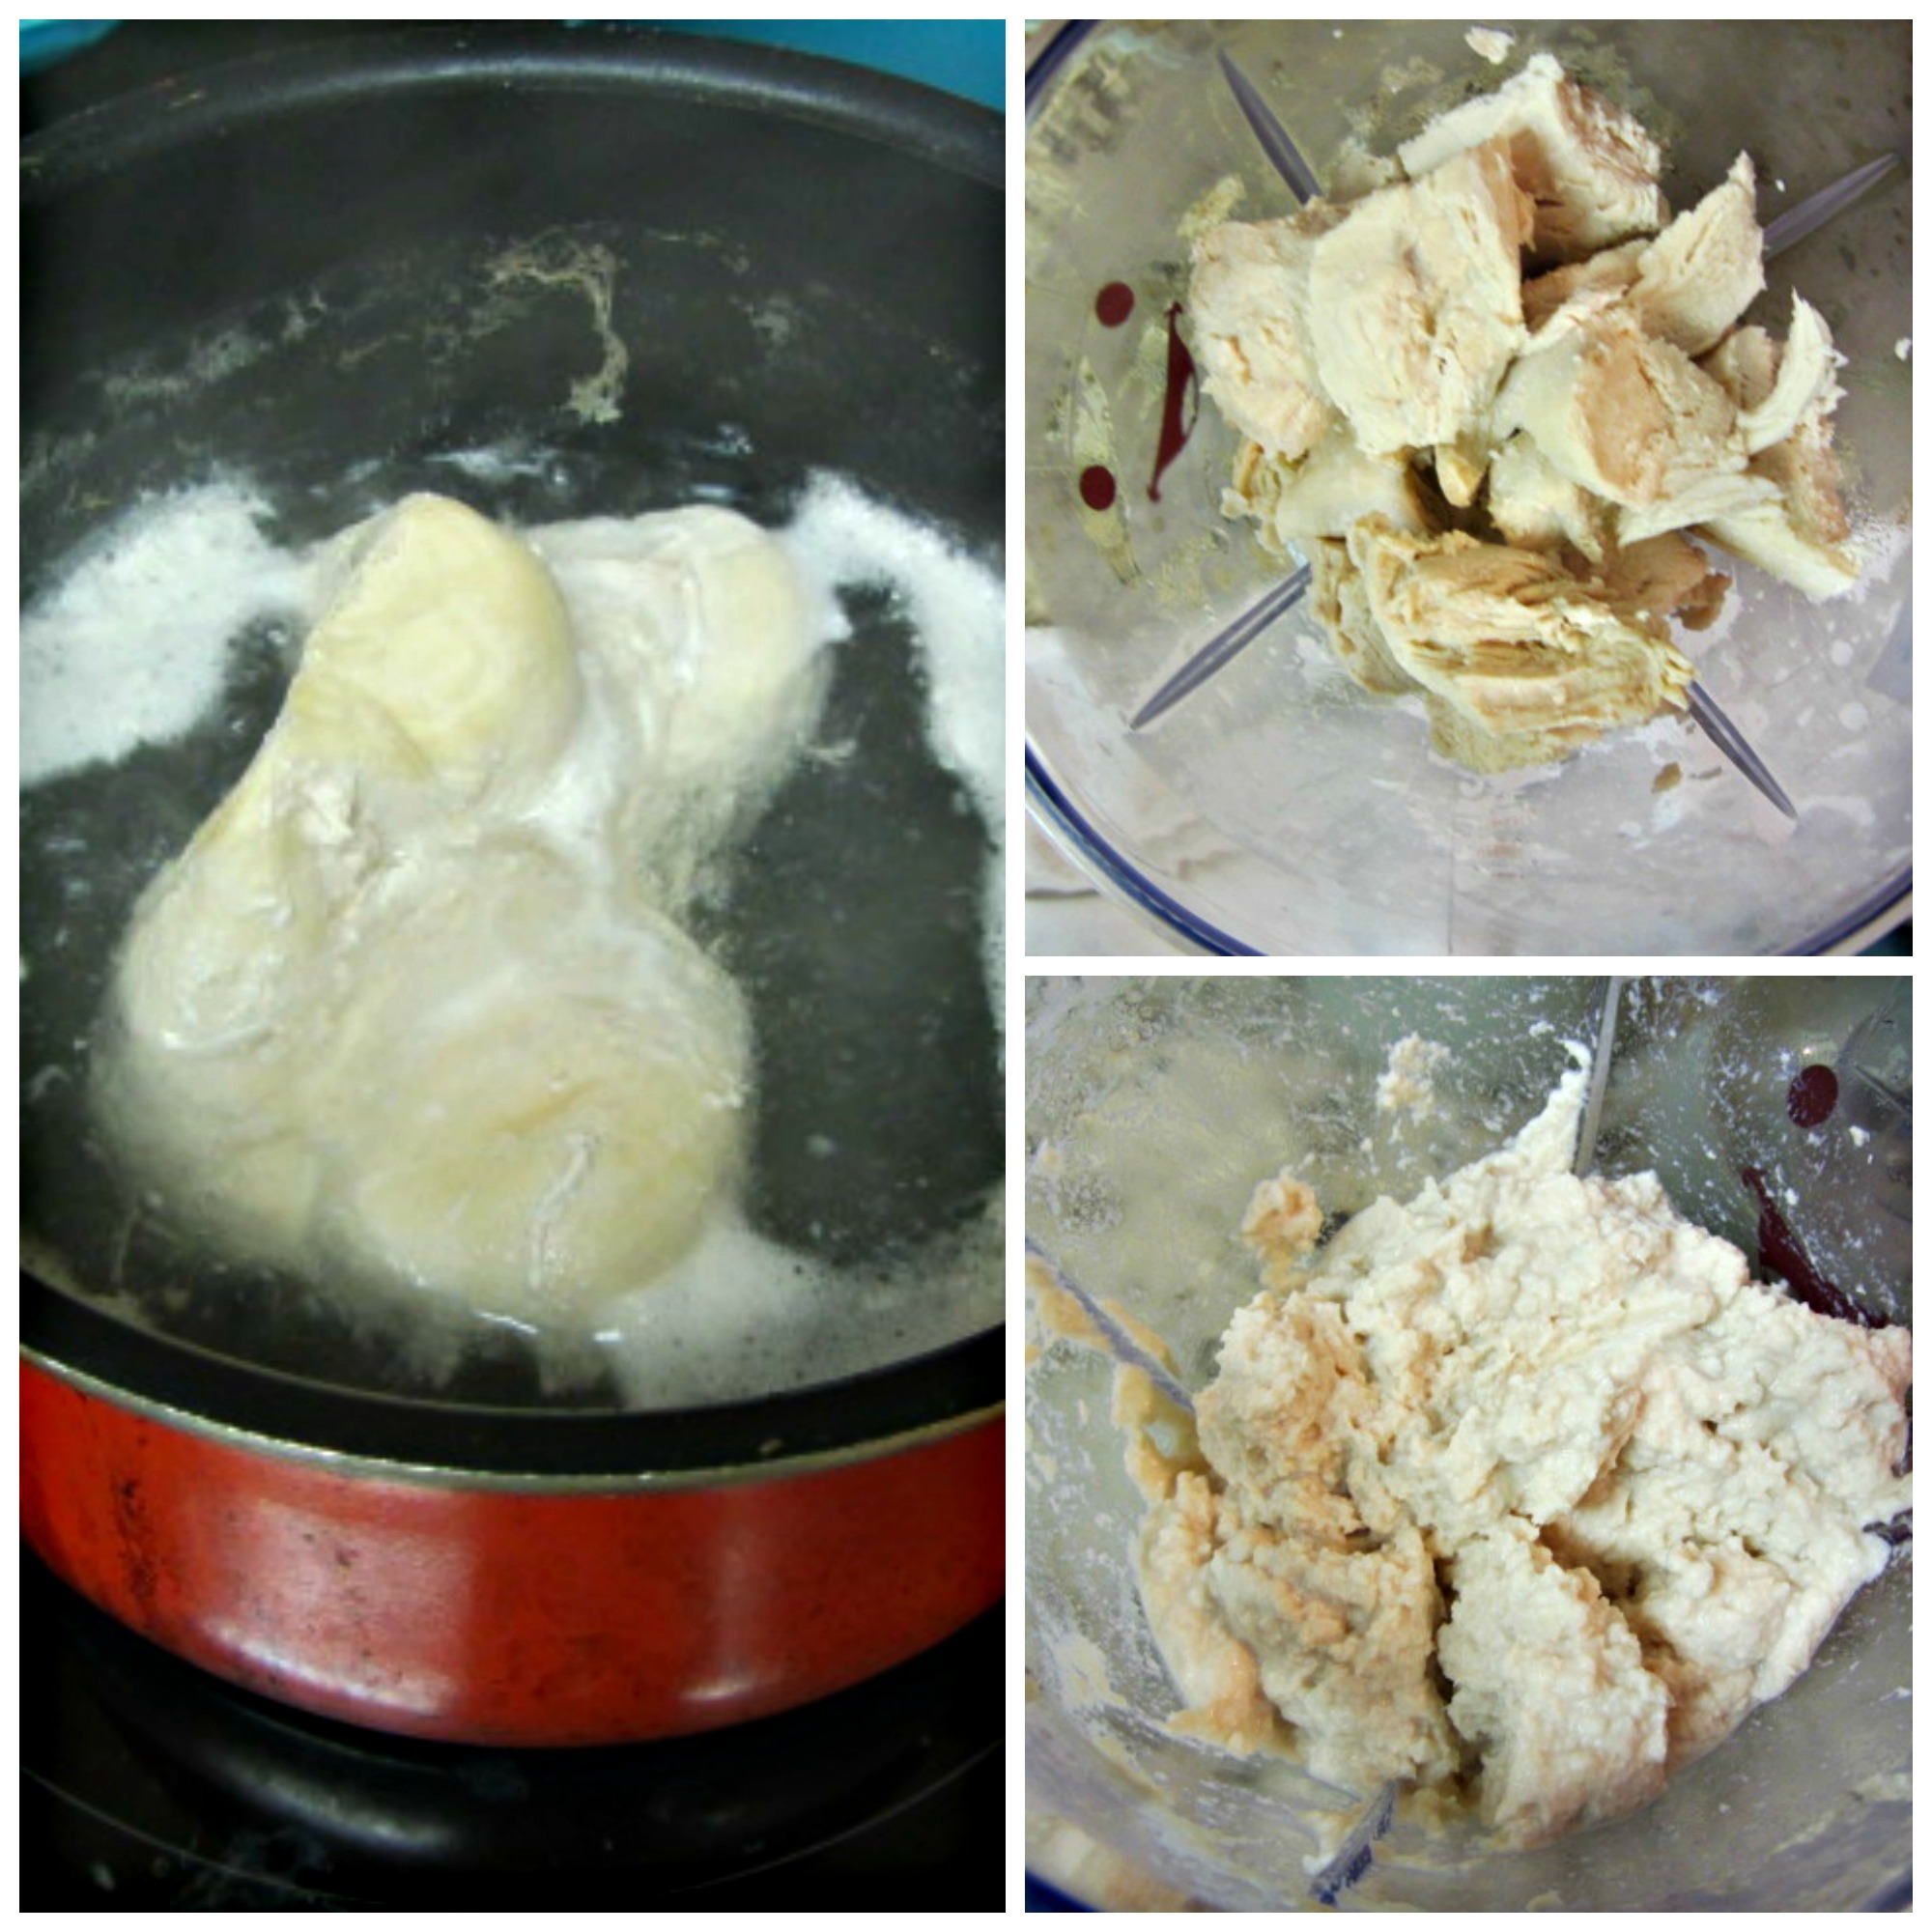
Place 4 ounces of boneless, skinless chicken breast (about one small breast) in a saucepan. Add enough water to almost cover the chicken. Cook for about 10 minutes over medium heat, until the chicken is no longer pink in the center. Chop and add to blender. Puree until smooth, add about 4 tablespoons of Organic Chicken Stock (no added sodium) or water to help smooth it out. Makes about 4 servings. Freezer-friendly.
 There you have it! See, it’s really not too difficult. You see a lot of the same methods repeated in baby purees (peel, chop, boil/steam/bake, puree/mash). I usually dedicate one day a week to do a bunch of cooking to stock the freezer for the coming week. If I’m really on the ball, I can make a couple weeks of meals in just a few hours.
The fun really starts once your little one has eaten a variety of foods. Get ready to mix and match fruits, veggies, meats, grains, and spices! Some of my favorite puree combos to make are Squash and Apples with Cinnamon; Blueberry Applesauce; Chicken Stew with Barley, Carrots, and Sweet Potatoes. Luckily, Quinn is a great eater and has made this whole process so enjoyable!
Ok, so she doesn’t always approve…
As long as this post is, I feel like it could be 10 times longer. There’s just so much to say about getting started with making baby food. Please, please, please, feel free to comment or ask questions! I’d love to either help you out on your baby food making quest or learn some helpful tips!
Expect another post sometime in the future on making baby food for older babies. Now that Quinn is feeding herself finger foods, we’ve shifted away from the purees. It’s a whole new world and I can’t wait to share it with you!


